Skip To Content Skip To Menu Skip To Footer

Student Computing Support

TV and SmartTV Registration

This page was designed to assist students in getting their TVs and SmartTVs (a "SmartTV" is a TV which can be connected to the internet and use built-in streaming apps such as Netflix, Hulu, etc.) connected to the campus Cable system and/or the WIRED network. If you need help connecting a computer or mobile device to the WIRELESS network, go here: www.dickinson.edu/wifi

PLEASE NOTE: This page is for SmartTVS WITH A NETWORK (ETHERNET) PORT and can connect to the WIRED network.

If your SmartTV or streaming devices DOES NOT have a network (Ethernet) port (such as: Roku, Apple TV, Fire, Google Chromecast, etc.) you will need to connect the device to the IoT WiFi network.  Click here to connect a device without a network port to the IoT WiFi network.

TWO WAYS OF CONNECTING TVs:


To Connect a TV/SmartTV to the Campus Cable System for Local Cable Programming, Follow These Steps:


1

Before You Begin


IMPORTANT! BEFORE YOU BEGIN, to connect your TV/SmartTV to the campus cable network you MUST have these two things:

  • A QAM Tuner: QAM tuners (pronounced "kwom") allow a TV to interpret channels from a cable system. MOST TVs include a QAM tuner, but if your TV does not, a separate QAM tuner can be purchased from (Amazon or elsewhere).
  • A Coax (coaxial) Cable: to physically connect the TV (or separate QAM tuner) to the cable wall jack


2

Connecting the TV to the Cable Wall Jack

 
  • Use your Coax (coaxial) cable to connect the TV's cable jack to a cable jack on the wall in your room.
    cableTVjack 


3

Scanning For Local Channels


Once your TV is connected to an available cable wall jack, you can prompt the TV to scan for local cable channels.

Please note: All TV manufacturers differ, so menu options, wording, and other items may vary. The best way to complete the channel scan is to refer to the TV owner's manual. If that is unavailable, the following general steps should guide you through the process.

  1. Using your television's remote control, press the Menu or Settings option.
    Note: a "Smart TV" may have a smart button that must be used to access the settings menu. It typically has the manufacturer's logo on it.
  2. Locate Channels or Tuner Set Up option.
  3. Check the menu for an option of Antenna Type or Connection Type followed by either Antenna or Cable. Make sure that the designated setting is Cable (based on manufacturer, alternate choices may include Digital Cable, CATV or Cable STD)
  4. From the menu, choose Digital Channel Search (based on manufacturer, alternate choices may include Channel Scan, Channel Search or Autoprogram.).
  5. Allow the TV to complete the search. You may see a bar listing how many channels have been found. The process may take up to an hour.

Once you have completed the channel scan you should have the campus TV channels. A list of channels for the campus cable TV system can be found here.


To Connect a SmartTV to the WIRED Network to Stream Content from the Internet, Follow These Steps:

1

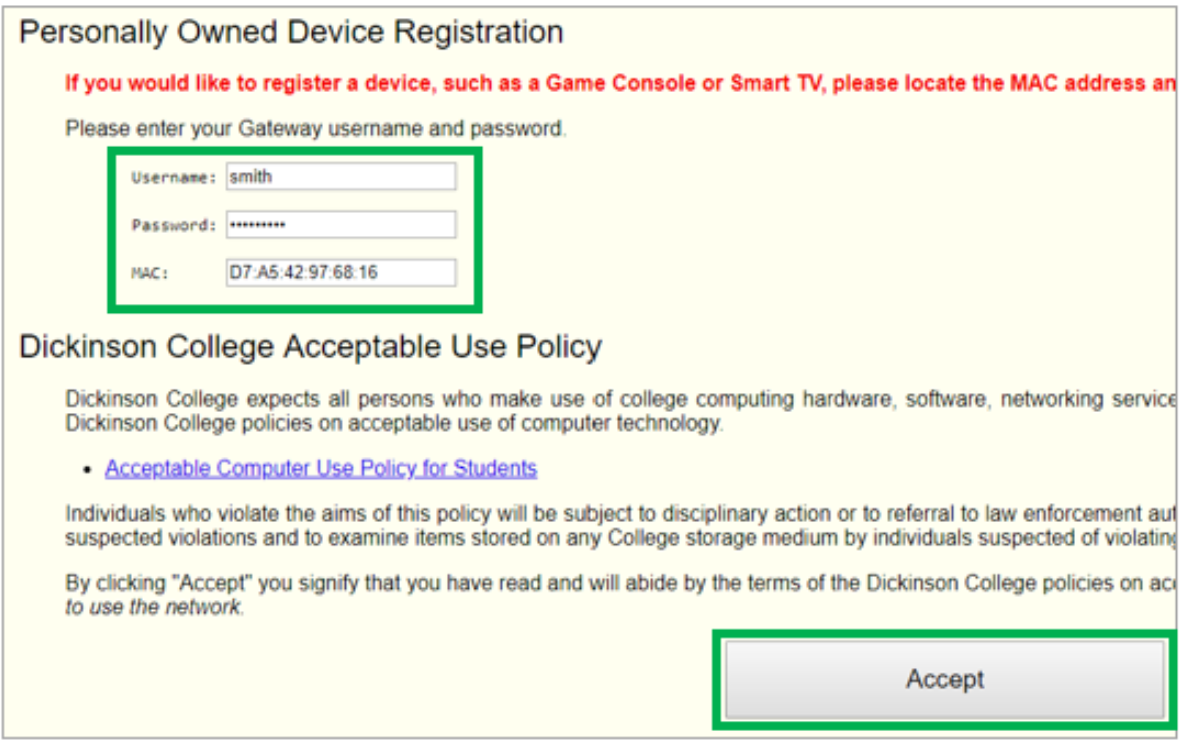
Register Your Device in the NetReg System

 
  • USING A COMPUTER WHICH IS CONNECTED TO THE DICKINSON NETWORK (wireless or wired), browse to NetReg (the device network registration system) [this link opens in a new window]
  • Enter your Dickinson username, password, and the Ethernet Address (a.k.a. “MAC” or “MAC Address”) of the SmartTV (or other device) you are registering on the network. 

  • Click Accept

    NetReg Screen


2

Check Your Device's Network Settings

 
  • If your SmartTV has been set to use a Wireless network or has been set with a "static" IP address when used at your home, those settings will need to be cleared. Your device must be configured to use its WIRED network port AND the network settings must be set to DHCP ("DHCP" is a network setting which means the device will receive an IP number from the network). 

    (Please note, ITS cannot provide instructions for this as there are a lot of different devices and network settings vary widely)


3

Locate A Network Jack


Once your device is registered in NetReg (step 1 above) AND you have confirmed that your device is using its wired port and set to DHCP (step 2 above), THEN connect your device's wired Ethernet port to a jack in your room via an Ethernet network cable. (if you do not have an Ethernet cable, they are available in the Dickinson Bookstore.)

  • Once your device is connected to a network wall jack, try your device to see if it is connected to the internet.
  • IF IT DOES CONNECT: STOP. Your registration is complete and you are finished. Enjoy!
     
  • IF IT DOES NOT CONNECT: try connecting the network cable to ALL other network jacks in the room and see if the device connects to the internet then.
    (note: it may be helpful to review the more detailed Knowledge Base article in conencting Games/SmartTVs before proceeding)
     
  • IF IT STILL DOES NOT CONNECT: Go to the NEXT step below.


4

Request Jack Activation Assistance


IF you have completed all three steps above and your device sill will not connect to the internet, it is possible the jack in your room may need to be activated.